
How do you get an iOS build into testers’ hands and turn their first 20 minutes into useful feedback?
To beta test an iOS app with TestFlight, upload a build to App Store Connect, create an internal testing group, and verify the core flow. Then create an external group, add the build and testing information, submit it for Beta App Review when required, and invite testers by email or a public link after approval. Testers install TestFlight, accept the invitation, install your app, and follow your test brief.
The main choice is who needs access. Internal testing is for eligible App Store Connect users with access to your app. External testing is for customers, community members, and other people outside that team. Start with a small internal smoke test, then recruit external users for the devices and product scenarios you need to validate.
This guide walks through developer setup and includes copyable notes, a 15–20 minute mission, device assignments, and a bug report example. All product names, build numbers, and scenarios below are illustrative templates, not results from a completed BetaRoast test.
How to use TestFlight as a developer
You need access to the app in App Store Connect and a build uploaded for that app. Use an identifiable version and build number so a tester’s report can be matched to the exact binary. For example, 1.4.0 (42) below is a placeholder you must replace with your own build.
- Open your app in App Store Connect and select the TestFlight tab. Upload your build through your normal Xcode or distribution workflow, then wait for processing to finish. Complete any information App Store Connect requests, including export compliance where applicable.
- Under Internal Testing, create a group such as
Core flow smoke test. Add the eligible App Store Connect users who have access to this app, then add the build to the group. Follow Apple’s internal tester setup steps. - Ask that group to check installation, sign-in, the primary task, and reopening the app. Fix blockers before widening the audience.
- Create an external testing group after you have created an internal group. Choose a specific purpose, such as
New user onboarding, rather than putting every test into one generic audience. - Add the build to that external group. Enter the What to Test note and complete Additional > Test Information, including the Beta App Description and Feedback Email. Use a monitored feedback address; it is also the reply-to address for tester invitations. If sign-in is required, prepare working review access and instructions that explain how to reach the features under review.
- Submit for Beta App Review when App Store Connect requires it. The first build submitted for external testing requires a full review; later builds for the same version may not. Check the actual status instead of assuming approval or a fixed review time.
- After the build is approved and available for external testing, invite testers by email or enable the group’s public link. If you did not select automatic notification, use Start Testing when you are ready to notify testers.
- Send the task, deadline, safe test data, and reporting instructions with the invitation. Confirm that at least one external tester can install and complete the mission before sharing the link more widely.
Apple’s external tester workflow and test information instructions explain the group, review, and required information steps. Use our TestFlight external testing checklist for a final operational check before recruitment.
TestFlight internal versus external testers
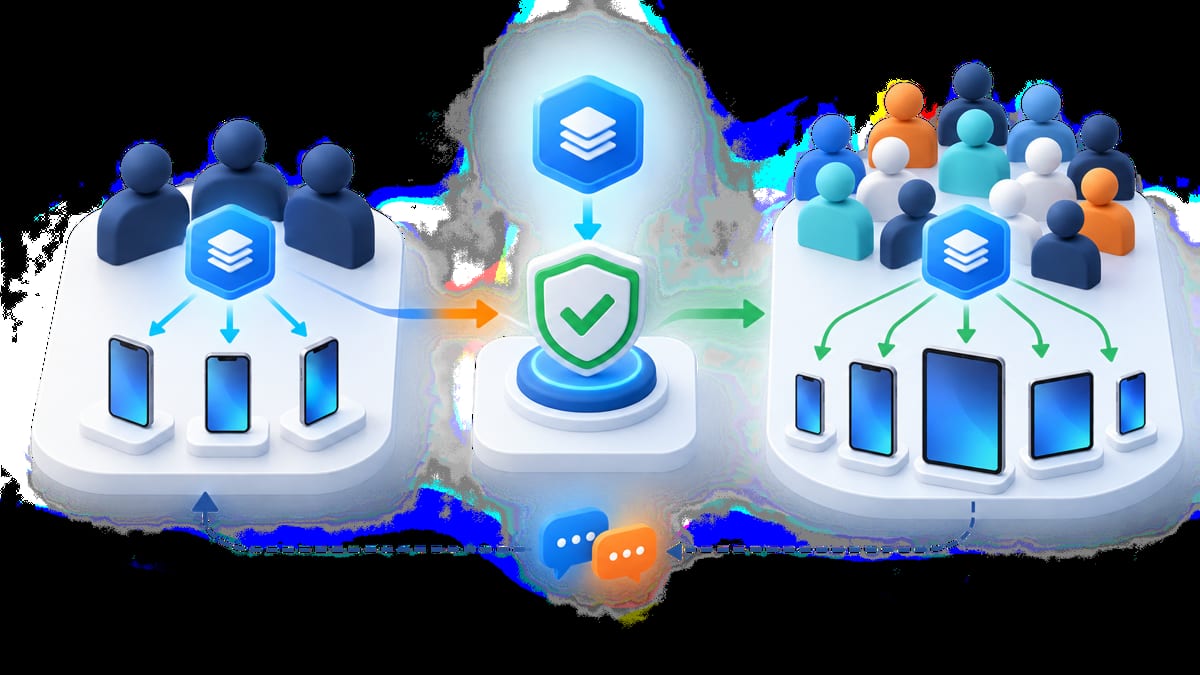
The difference between internal testing and external testing in TestFlight is team access and distribution eligibility, not the quality of a person’s feedback.
- Internal testers up to 100 eligible App Store Connect users with access to your app. Supported roles include Account Holder, Admin, App Manager, Developer, and Marketing. Use this path for trusted team members checking build stability, installation, and core behavior. Do not give a customer an App Store Connect role just to avoid the external testing workflow.
- External testers up to 10,000 testers per app. They can join through email invitations or a public link without becoming App Store Connect users. Use this path for customers, targeted device coverage, and people encountering the product for the first time. External distribution requires the applicable Beta App Review step.
- Internal-only builds a build uploaded as TestFlight Internal Only cannot be used for external testing. If you plan to invite people outside the team, upload a build eligible for external distribution. Apple describes this restriction in its internal testing instructions.
For a two-person development team, a sensible sequence is internal installation and sign-in checks, followed by a focused external round covering new-user onboarding. For an established app, use internal testers to verify a fix and external testers to validate the affected real-world scenario. These are planning examples, not platform minimums or promises that a particular tester count will find every issue.
Apple’s TestFlight overview documents the tester limits and build availability. A TestFlight build is available for testing for up to 90 days, so keep a replacement-build plan for longer rounds.
Copy a TestFlight What to Test note
A useful note tells testers what changed, where to start, and what evidence you need. Replace the brackets and example flow before pasting this into App Store Connect.
Build. [version and build number]. This round checks first-time onboarding and saving your first item. Start with a new test account using the supplied test data. Create one item, deny the optional notification permission, then close and reopen the app. Expected result. The saved item remains visible and the app explains how to enable notifications later. Also try one save while offline and tell us whether recovery is clear. Report blockers with your device, OS, build, numbered steps, expected result, actual result, and a screenshot or recording with private data removed. Feedback channel. [form or support address]. Deadline. [date, time, timezone]. Known limitation. [specific limitation, or none known].
Keep the scope small enough for one sitting. If the build primarily changes subscriptions, replace this mission with a purchase and restore scenario and use the TestFlight in-app purchase testing guide to prepare that round. For prompts and recovery after denial, use the iOS permission testing guide.
Download the TestFlight beta test plan for an editable plain-text version of the note, invitation, mission, coverage plan, and report fields. The examples here are self-contained so you can also copy them directly.
Recruit and invite iOS beta testers
TestFlight distributes builds; it does not recruit the right audience for you. Screen candidates for device model, OS version, relevant product experience, language, availability, and ability to submit evidence. Ask only for information you need for the test.
Use the guide to finding beta testers to choose recruitment channels and write a screening brief. Existing customers can validate changes to familiar workflows; people who have never used the app are better suited to checking whether onboarding makes sense without coaching. On BetaRoast, describe the task and required device profile in your testing round before inviting candidates.
Ready-to-copy tester invitation
We are looking for [target user profile] to try [app name], an iOS app for [specific task]. You need [device requirements] running [supported OS range] and 15–20 minutes before [deadline with timezone]. Install TestFlight, open [invitation or public link], and install build [version/build]. Your mission is to create a test account, save one item, and check what happens after denying notifications and briefly going offline. Use the supplied example data only. Send feedback through [channel] with device, OS, build, steps, and any redacted evidence. Reward. [actual terms, or clearly state that the round is unpaid]. If installation fails, contact [support channel] before spending time troubleshooting. You may stop participating at any time.
Use email invitations for a selected cohort. A public link can help with broader recruitment and can include device or OS criteria, but a functioning link still depends on an approved, eligible build and the group’s configuration. Names and email addresses of public-link testers are not visible in App Store Connect, so do not assume you can identify each recruit from that view; see Apple’s tester information reference. Our TestFlight public link guide covers link setup, capacity, filtering, and tester installation troubleshooting in detail.
A 15–20 minute iOS beta testing mission
This sample mission is for a fictional item-saving app. Adapt the task to your product’s primary action. The expected outcomes below are test criteria, not observed results.
- Minutes 0–3. Install and identify the build. Accept the invitation, install through TestFlight, and record device model, OS version, app version, and build number. Stop and report if installation or launch fails.
- Minutes 3–7. Complete the first task. Create a new test account and save an item called
Beta sample 01. Expected. The task completes without coaching and the saved item appears in the list. Note any unclear wording or navigation. - Minutes 7–10. Deny an optional permission. Decline notifications when prompted, then continue the main task. Expected. The app remains usable and does not repeatedly pressure you with the same prompt. Skip this step if the app has no relevant permission request.
- Minutes 10–14. Try interrupted connectivity. With safe test data, briefly disconnect the network and attempt another save. Reconnect and observe recovery. Expected. The app states whether the item was saved, avoids silent data loss, and provides a clear retry path when needed.
- Minutes 14–17. Reopen and check persistence. Close and reopen the app. Expected. The account and successfully saved item are still in the state promised by the product.
- Minutes 17–20. Submit the report. Describe the first blocker or moment of confusion. If no problem occurred, report which steps you completed and your environment rather than just saying “works fine.”
Keep repeatable task data separate from customer records. For a returning-user or upgrade round, explicitly name the previous build and starting account state; a fresh installation does not establish that an upgrade works.
Sample device coverage plan
Select actual devices from your supported OS range and audience data. This example assigns six testers to different risks; it does not claim six people provide complete coverage.
- Tester A an older supported iPhone on the minimum supported iOS version; fresh account and installation.
- Tester B a commonly used iPhone on a recent supported iOS version; upgrade from the previous beta build with existing synthetic data.
- Tester C a smaller supported screen; larger text settings and onboarding readability.
- Tester D a larger supported screen; dark mode and interrupted Wi-Fi or cellular connectivity.
- Tester E a supported iPad and iPadOS version, if the app supports iPad; orientation and core layout behavior.
- Tester F a user matching a secondary language or accessibility need; localization or VoiceOver on the primary task.
Assign one main mission and one risk per person. Record completed tasks beside each device and build so an invitation count does not masquerade as coverage. Add focused cases for camera, Bluetooth, location, deep links, background behavior, or purchases when your app depends on them.
A bug report developers can act on
Give testers this blank format alongside the mission. The mobile app bug report guide explains how to turn incomplete feedback into reproducible evidence.
- Title [one observable problem]
- Environment [device model, OS, version/build, network, fresh install or upgrade, account state]
- Steps [numbered actions from a clear starting state]
- Expected [what the task promised]
- Actual [what happened]
- Frequency [attempts affected out of attempts made]
- Impact [whether the core task is blocked and whether a workaround exists]
- Evidence [redacted screenshot or recording, timestamp and timezone if useful]
Illustrative completed report
This is a synthetic example showing report structure, not a confirmed defect in a real app.
Title. Saved item disappears after reopening while offline. Environment. [device model], [OS version], example build 1.4.0 (42), fresh test account, Wi-Fi disconnected after first successful save. Steps. 1. Sign in with the test account. 2. Save “Beta sample 01” while online and confirm it appears. 3. Disconnect Wi-Fi and cellular. 4. Close and reopen the app. Expected. The previously saved item remains available if offline access is promised. Actual. The list appears empty with no offline explanation. Frequency. [record actual attempts]. Impact. Cannot tell whether data was lost; reconnecting is the suspected workaround. Evidence. [redacted recording and timestamp].
Preserve the tester’s observations even if you later discover a different root cause. Do not rewrite a report as “data loss” until you have evidence that data was actually lost.
Quick TestFlight troubleshooting
- Build still processing or not approved check its status in App Store Connect before sharing an external invitation. Processing, Ready to Submit, Waiting for Review, and Testing describe different states. See Apple’s build status reference.
- External invitation is unavailable confirm that the build is attached to the correct external group, has the required approval, and that testing has started. Check manual Start Testing if automatic notification was disabled.
- Internal build works, external distribution does not check whether it was uploaded as TestFlight Internal Only. That build cannot be reused for an external group.
- Public link cannot accept a tester check enabled status, tester capacity, device or OS criteria, and the group’s approved build. Follow the public link troubleshooting steps for the specific join error.
- Build expired a TestFlight build can be tested for up to 90 days. Upload and distribute a newer eligible build, then update the mission with its build number.
Resolve installation issues before collecting product feedback. A tester who cannot join the correct build has not tested the feature, even if they accepted your recruitment invitation.
Review feedback and ship deliberately
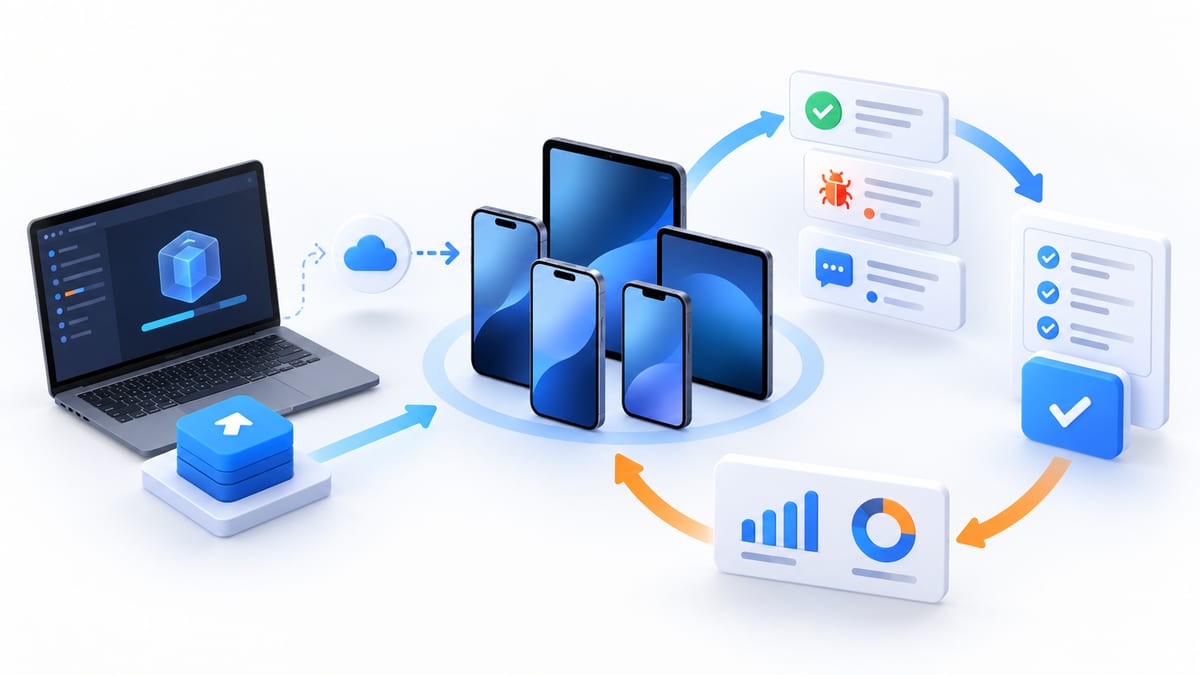
Review reports on a predictable cadence and separate installation failures, confirmed defects, usability observations, and feature requests. Prioritize crashes, sign-in failures, data loss, and blockers in the main task. Ask for missing device or reproduction details before marking a vague report fixed.
Return fixes to the original reporter with the new build number and exact step to repeat. Record whether the issue is reproduced, needs information, fixed for retest, verified, or deferred. A quiet inbox is not release evidence if testers have not completed their assignments.
Before release, check that the primary task succeeds on your priority device and OS combinations, high-impact findings are resolved or explicitly accounted for, and the team can explain the remaining limitations. External TestFlight approval is a distribution gate; publishing the app still follows the App Store release process.
Frequently asked questions
Can I use TestFlight without publishing my app?
Yes. TestFlight distributes pre-release builds from App Store Connect before a public App Store release. You still need the app setup, an eligible uploaded build, and the review required for external testing.
Do external testers need App Store Connect accounts?
No. External testers join through an invitation or public link and install the build through TestFlight. Internal testers are eligible App Store Connect users with access to the app.
How long does TestFlight external review take?
Do not promise a fixed turnaround. Check the build’s review status in App Store Connect and leave time to respond if Apple needs information or changes. Invite external testers once the build is approved and testing is available.
How many TestFlight testers should I recruit?
Recruit enough people to cover your prioritized user, device, OS, and task combinations, then expand when coverage is missing. Apple’s limits of 100 internal users and 10,000 external testers per app are capacity limits, not recommended cohort sizes.
Does TestFlight pay beta testers?
TestFlight does not automatically pay testers. If your recruitment round offers a reward, state the actual eligibility, completion criteria, amount, and payment timing before someone joins.
Put the plan into a testing round
Prepare your eligible TestFlight build, copy the mission, and define the devices you need. Then create a BetaRoast testing round with the invitation, deadline, and reporting instructions so candidates know what participating involves. Use the first completed reports to refine the next round rather than asking every tester to explore the whole app.
Start iOS app beta testing by uploading an identifiable build to App Store Connect and checking installation, sign-in, and the core task with internal testers. Then add an external group when you need customers or people outside your App Store Connect team. Check Beta App Review and build status before promising an invitation date. Give testers a specific What to Test note, a short mission, safe test data, and an evidence format they can copy. Assign device and OS coverage deliberately instead of asking every person to explore everything. Review blockers first, return fixes to the people who reported them, and release only when the important tasks have evidence behind them. TestFlight handles distribution; your team still owns recruitment, test design, and the release decision. Use the downloadable plan to prepare the round, then recruit people who match the task and device requirements.